30 results found with an empty search
- Why Micro Four Thirds is Bad for WIDE SHOTS (& Full Frame Terrible for TELE)
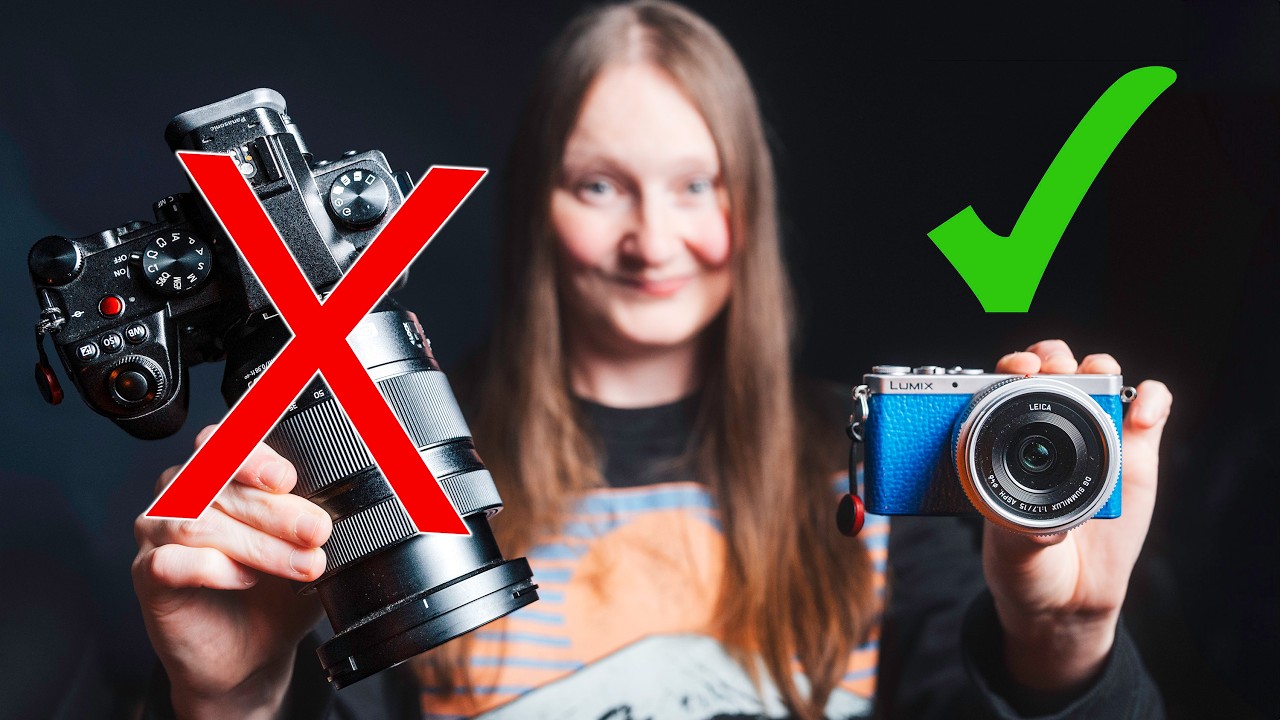
INTRO: While testing camera systems (mostly for hybrid and video production use) I started searching for a way to get the 3 Simple Shots (WIDE, TIGHT and TELE) that are part of the SHOOT43 multicam method, and in so doing, I've learned 2 things: #1: WIDE shots are troublesome on Micro Four Thirds, but terrific on full-frame, and #2 TELE shots (telephoto) shots are troublesome on full-frame, but terrific on Micro Four Thirds. This realization really opened up a new way that I think about sensor sizes and I'm no longer loyal to either format. I think the problem is I was trying to make one sensor size do everything. Now, I play to the strengths of each format, and this has made figuring out my 3 Simple Shots (WIDE, TIGHT and TELE) a lot easier...though it hasn't made full-frame cameras more affordable, so I'm still using mostly Micro Four Thirds. BTW, this post may contain affiliate links, which means we receive a commission (at no cost to you) if you make a purchase through a link. There's a difference between the wide shot on an action camera and a REAL camera...but exactly why does the (wide angle) shot look so different? It's a combination of both the sensor size AND the lens focal length. The Myth of "Equivalent" Focal Length I love using Micro Four Thirds cameras, but there's a lot of advice online that is just wrong, and there's kind of a myth about "equivalent" focal lengths. People say things like, “A 25mm lens on M4/3 is like a 50mm on full frame” but that really isn't true. Yes, 2x 25mm does equal 50mm, but 25mm and 50mm lens designs are totally different...and so they produce different distortion and subject/background relationships. For example, the “non-distorting” focal length (what looks most like what our eyes see) is about 42.5mm in full frame terms. When you go wider (lower numbers: 35, 28, 24mm) you start getting into wide angle optics which distort the image to capture more of the scene, on a sensor with a smaller physical size. Bridge cameras (1" sensors or smaller) and action cameras face the same small-sensor issue (of needing wider optics to cover the scene) and tiny phone sensors are even worse. The main point is, it's the lens, not the sensor that decides what the image is going to look like. The SENSOR is only determining how much of that lens’s image you are able to capture, kind of like cropping. So, when you use different lenses—say, a 25mm on a M4/3 sensor or a 50mm on full frame—the images really aren’t the same. Therefore, I think it's better to learn what each type of lens optic does, and then decide what camera (sensor size) you need, based on how much of the image you need to capture (from said lens). Table of Contents: PART 1: About The WIDE, TIGHT and TELE Thing PART 2: The WIDE Shot = Full Frame is King PART 3: What's Wrong With Wide Angle? PART 4: The TIGHT Shot: Any Sensor Works (1x, 1.5x, 2x) PART 5: The TELE Shot: Micro Four Thirds! PART 6: The Importance of Working Distance PART 7: Use Multiple Cameras PART 8: Extra Tips About The WIDE, TIGHT and TELE Thing Most people use the classic language: wide, medium, and tight shots. I like to say wide, tight, and tele. The reason is that a “tele” shot always uses a telephoto lens, while “tight” and “medium” aren’t always clear about what lens you need to use. And in practice, what matters is both what the shot looks like and how you get there—lens and sensor size together. Hollywood technically names shots by how much of the subject is in the frame (not just the lens), but as someone trying to systematize real-world setups, I think it makes sense to focus on both how the scene appears and the tools we use to get there. The WIDE Shot: Full Frame is King For wide shots—the kind that cover a whole room, landscape, or scene—full frame shines. Why? Because full frame sensors let you use more “normal” focal lengths (35mm, for example), which naturally distort less. On M4/3, a 35mm becomes your tight shot; on full frame, it’s a true wide shot with realistic proportions. That realism is why photojournalists historically loved 35mm on film: It was wide, but not crazy. Full frame simply gives you a more honest, un-distorted view for wide shots than any crop sensor or phone (which rely on intense wide-angle distortion to get more in frame). Why a Full-Frame WIDE Shot is More Realistic: Full-frame sensors can produce wide shots with less distortion at moderate focal lengths (35mm–42.5mm). This can result in a more natural, immersive view with accurate proportions. Historically, 35mm on full-frame has been a standard for photojournalism due to its perspective. Most people don't see wide angle distortion unless it's pretty extreme (as is the case here). The reason is that we've seen so many half-way distorted images, that we don't know it's not normal. What's Wrong With Wide Angle? Wide angle lenses stretch the image out at the edges and make subjects in the center look smaller. Classic “fisheye” lenses are an extreme case—think of old peephole door viewers, where the middle is tiny and the edges are curved and stretched. More “rectilinear” wide lenses (the kind that try to keep straight lines straight) didn’t arrive until the late 80s/early 90s, and even those can’t escape every bit of distortion, especially as you shoot wider than 14mm. This distortion is obvious in real estate photography; small rooms look huge, doors look unnaturally wide, and buyers wonder why reality doesn’t match the photos. That’s the lens at work, not a “lie,” but definitely a stretch. I’m currently experimenting with ways to minimize this, including tilt-shift lenses, but the key takeaway is: Sensor size and lens type have a huge effect on how wide shots feel. Wide Angle Distortion & Architecture: Ultra-wide lenses are often used to make spaces look bigger, but this can misrepresent reality. Distortion may cause features like doors and windows to appear stretched or out of proportion. This effect can be noticeable in real estate photography, where rooms may appear larger and features like doors and windows may look distorted. Wide-angle lenses (24mm and below) can stretch the edges of the frame, making objects near the edges appear larger and those in the center smaller. Tilt-shift lenses may help correct perspective and reduce stretching. Tilt-shift lenses** can help correct perspective distortion, maintaining straight lines and accurate proportions. Using moderate wide angles and correcting distortion in post-production are also options. The TIGHT Shot: Any Sensor Works (1x, 1.5x, 2x) For basic tight shots—think from the waist or chest up, or showing half a room—M4/3 and APS-C (1.5/1.6x crop sensors) are where it’s at. They give you a wide choice of affordable 25–50mm lenses (vintage or modern), and you can control working distance easily. Full frame cameras lag here: The lenses cost more, and you have less reach for a given size and price. Unless your full frame camera can crop into APS-C mode on demand, I’d give this job to crop sensors (with a slight edge to M4/3 for value and no recording limits on many Panasonic bodies). About Medium (Tight) Shots: Focal lengths of 25mm–50mm on micro 4/3 (50mm = 100mm equivalent) are commonly used. Full-frame cameras may have limitations such as shorter recording times or overheating. Micro 4/3 cameras may offer longer recording times and good value for this purpose. The "TIGHT" shot (which most call the "Medium" shot) is pretty easy to capture with all sensor sizes. If you're on a full-frame sensor, you'll need to use a little telephoto; I prefer a crop-sensor with a less-distortive 50mm. The TELE Shot: Micro Four Thirds! For tight and telephoto shots, especially things like distant details, you need a lot of “reach.” On full frame, getting a true 600mm-equivalent telephoto is both outrageously expensive and really heavy. But put a 300mm vintage autofocus lens (from the bargain bins!) on a Micro 4/3 body, and you get the same field of view for $30–$50, and a lot less weight. Another bonus: In-body image stabilization (in cameras like the Panasonic G85 or G95) is really effective with those older, non-stabilized telephoto lenses. With M4/3, keeping your subject in focus is actually easier at high “equivalent” focal lengths, since they don’t have razor-thin depth of field like 600mm on full frame. M4/3 simply does telephoto and tight shots best for cost, handling, and results. Why Micro Four Thirds Works for Telephoto Shots: Micro 4/3 sensors can provide a 600mm equivalent field of view with a 300mm lens. Lenses for micro 4/3 are often lighter and more affordable. In-body image stabilization (IBIS) on certain Panasonic models can be helpful with older, non-stabilized lenses. Some vintage 70-300 lenses (the Tamron, Promaster, Quantaray 1:2 MACRO version) are a really good value. Cost, size, and weight are why I like Micro Four Thirds for TELE shots. I apologize for using this meme again, but the point is, when you're using full-frame your telephoto lens has to be a lot bigger to cover the sensor. The Importance of Working Distance Another crucial factor is how far you need to be from your subject to get the shot. For portraits, you hear the advice: use 85mm or 100mm, not 50mm (for full frame). Why? Because on a 50mm, you need to get closer for a head-and-shoulders crop. Closer means faces start to look distorted—noses grow, features warp a little—even with “normal” lenses. Working distance matters for macro/close-ups, too. With a short lens, you have to get close, which blocks light, startles insects, and creates practical issues. So, the right lens/sensor combo isn’t just about field of view, but how you physically work. How Sensor Size Influences Working Distance: Micro 4/3: A 50mm lens may require standing 7–10 feet from the subject for a tight shot. Full-frame: Getting a tight shot with a 50mm requires getting closer (sometimes results in big noses) Portraits: Lenses such as 85mm or 135mm on full-frame are often chosen to avoid distortion and provide flattering compression. The last question is: What's the solution to all of this madness? What I do is use multiple cameras (change your camera, not your lenses!) P.S. I use a lot of adapted Nikon-mount lenses, so they work on full-frame too! Using Multiple Cameras One of the things I try to avoid at all costs, are "jump cuts". Jump cuts are abrupt changes in framing that occur when a person only used a single camera for a talking head shot, and edits things out of the footage. This can be very distracting in interviews or narrative work...and the solution is to "Always shoot with (at least) two cameras". Using two or more cameras allows for simultaneous capture of WIDE, TIGHT, and TELE shots. This can provide more flexibility in editing and help create a more dynamic final product. Extra Tips: TIP 1 MATCH CAMERA (SENSOR) TO SHOT TYPE Telephoto: Micro 4/3 for reach, stabilization, and affordability. Medium/Tight: Micro 4/3 for flexibility and longer recording. Wide: Full-frame for minimal distortion and natural perspective. TIP 2 SELECT APPROPRIATE LENSES Vintage lenses can be useful for telephoto work on micro 4/3. Tilt-shift or moderate wide-angle lenses may be helpful for architectural photography. Fast, sharp primes are often chosen for tight shots. TIP 3 DON'T BE EXCLUSIVE TO ONE SENSOR SIZE Each sensor size and camera system has its own strengths and limitations. Assigning each task to the most suitable tool may be more effective than relying on a single system. CONCLUSION: When you stop trying to make one camera do everything, everything becomes easier. Simply give each sensor size the job it does best. You’ll spend less on lenses, your shots will look better, and you won’t be wrestling with the limitations of any one system. So, instead of worrying about which focal length “matches what (on another sensor size)” I now focus on choosing what lens (focal length) I want to use to get the look I want, and then SENSOR SIZE considerations are all about how much of that image I want or need to use. The following ads help fund THIS BLOG (Click one to send me money for 100% free ) I know, sometimes these ads look the same... ...But I figure if I'm trying to make money, so why not post 3 of them eh?
- Both Full Frame AND Micro Four Thirds (On a Budget)?
INTRO: If full-frame cameras weren't so expensive (here's a list of affordable full-frame cameras ) wouldn't everyone just buy full-frame cameras? Well, as of now cost is still the problem, but if it were not that's a good question. However, I think each sensor size has both strong areas and weak areas, and some where they just can't compete with each other; so I think people would buy both. But, for some reason in the world of media production, filmmaking and "content creation" this battle between camera formats (sensor sizes) has often involved heated debates. The horrendous insults and peer pressure of this battle has pushed people toward taking "sides" and most have found themselves firmly aligned with one format or the other! To address this, I've been considering using both formats. If you've seen my lens-sensor settings tests of budget cameras , you'll know I've been using Micro Four Thirds. Yet, most of the lenses I use are old, full-frame Nikon F-mount lenses...and so using these on a full-frame sensor won't be a problem (unless I start to think I need autofocus). So now, other than the cost of full-frame cameras , I'm excited about this approach, and I hope it can not only make people argue less (because we'll experience the benefits of both formats) but also help us to be prepared for any shooting situation we encounter (which is the goal after all). BTW, this post may contain affiliate links, which means we receive a commission (at no cost to you) if you make a purchase through a link. When deciding which sensor size works the best for you, one of the biggest factors is the LENSES! WHICH SENSOR SIZE IS BETTER? In my opinion, if you're just starting out (or are just on a limited budget and/or just want to travel lighter) Micro Four Thirds can make a lot of sense (especially if you want to " always shoot with (at least) 2 cameras " like I do). The prices of the camera bodies and lenses are much cheaper than their full-frame equivalents, and so you can build a 2 or 3 camera system for much less. Yet, there are some things that smaller sensors just cannot do. They can't blur the background as easily (when you need to). Then, in low-light situations, certain Micro Four Thirds sensors (GH4, G7, G85, GX85) really need an f/1.4 lens. Full-frame cameras on the other hand, usually work better in low-light situations and have no trouble blurring the background with most lenses...but there are some downsides. Full-frame camera bodies are getting smaller (see the LUMIX S9) but the lenses are not only bigger, heavier, and less portable, but they've been way more expensive (though there are a few new brands working on solving this). There are lots of things to compare though, so let's do details. Comparison of Formats WHY MICRO 4/3? WHY FULL-FRAME? A DUAL CAMERA SETUP? LENS DIFFERENCES... A GOOD LEARNING EXPERIENCE? WHY MICRO 4/3? THE LENSES ARE SMALLER AND... Micro 4/3 cameras, such as the Panasonic GX85 or G85, are particularly appealing for beginners and those on a budget. They offer a range of affordable lenses and accessories, making it easier to build a versatile kit without breaking the bank. Additionally, the crop factor of micro 4/3 cameras can be beneficial for sports and wildlife photography, where a longer effective focal length is often required. For example, using a budget 70-300 lens (from the 1990s) on a micro 4/3 camera provides an equivalent focal length of 600mm, which is perfect for capturing distant subjects. That is one of the main reasons I like using Micro 4/3 (because the optics of a 70-300, for example, are a LOT smaller and lighter than an equivalent crop on full-frame). A Micro Four Thirds camera and a 70-300 can provide decent framing of almost any shot, even from a distance! Keep in mind that for TELE shots especially, it's important to have a camera with good IBIS, which many of the popular M43 cameras is do (the GX85, G85, G9, GH5, etc.). Having said all of this, I really do like using a Micro Four Thirds body with a wide angle lens on a TILT/SHIFT adapter (see that post)! This tiny lens is actually a TELE zoom lens (for Micro Four Thirds). The full-frame equivalent would be a 90-300mm...but there are optical differences between formats. For example, an actual 300mm lens on a micro 4/3 camera would provide a 600mm equivalent, but the optical characteristics differ significantly. The depth of field and telephoto compression are different, which will impact the overall look of the shot. M43 Positives: You can adapt almost any lens (for real) Lenses are usually less expensive (except for Leica lenses) Lenses are usually smaller and lighter (more portable) A telephoto lens is effectively longer (good for sports, wildlife, etc.) IBIS is better on Micro Four Thirds (especially on Panasonic) TILT/SHIFT Adapters are available (no other format can do this as well) Good M43 camera bodies are cheap (G85, GX85, G9, GH5) M43 Negatives: 1. Worse in low light 2. Wide Angle shoots look more distant (due to shorter focal length) 3. Some older bodies have bad AF (pre-phase-detect Panasonic) WHY FULL-FRAME? THE LENSES ARE BIGGER AND... Full-frame cameras aren't really affordable for me (yet) so they're not really a viable option, and full-frame lenses are not only more expensive, but also bigger and heavier most of the time. So, what are the advantages of full-frame? Full-frame sensors do typically deliver superior image quality (especially in low-light) and the ability to blur the background more (i.e. shallow depth of field) is appealing to many people. (I think the blurred background trend has been leveling out, thanks to the video about bokeh addiction and the follow-up historical tutorial ) because people are realizing most real, professional movies don't always blur the background. it's really still photographers who still believe it's a good idea. The truth is, you can actually get a blurred background using smaller sensor cameras...and not just with an F/1.4 (or a TELE lens). It also depends on the subject distance, etc. If you're trying to get your TELE (telephoto) shots, full-frame is not the best option. TELE lenses are much heavier, larger and more expensive on full frame. I learned this first hand when I had this old Nikon 80-200 2.8. FULL-FRAME IS BETTER (FOR THE WIDE SHOT) Are there any unique strengths of full-frame sensors then? I think there are, but it's in something not many people are talking about: less-distortive WIDE shots. The reason is, full-frame cameras don't require as short of a focal length to capture a wide angle image. Therefore, a wide angle can be closer to that magical, non-distortive focal length of 42.5mm (where there's the least distortion from optics). If you go wider than 42.5mm, you'll introduce wide-angle distortion characteristics (and there are a variety of them) which range from being almost non-noticeable to looking like a full-on fisheye lens. The benefit of full-frame is that you can use a moderate wide angle lens (such as a 35) and capture enough of the scene...and it still look pretty realistic (and accurate). If you're creating a WIDE shots on a Super 35 (1.5x crop) sensor however, it's not going to look as real. (Super 35 is perfect for TIGHT or or medium shots, but not so much for the WIDE shots.) The worst format for WIDE shots would be Micro Four Thirds (2x sensor crop) then, because you will need the shortest focal length to project the image onto a smaller (2x crop) sensor. Full-Frame Positives: Superior image quality (especially in low-light conditions) It's easier to blur the background (if you need to) Less distortive WIDE shots (provides a more natural perspective) Full-Frame Negatives: Camera bodies are more expensive (they are going down though) Most lenses are bigger and heavier (than M43) Lenses are often more expensive (than M43) Telephoto lenses are REALLY huge (and SUPER expensive) AN AFFORDABLE FULL-FRAME CAMERA (<$1,000)? Here's a quick list (if I missed any options let me know in the comments) of the best mirrorless (not going with a DSLR, for a number of reasons) full-frame cameras being sold for under $1,000 US, and it's clear there isn't much available for around $600, which is where I want to be. These are average Ebay prices (taken from both auction and buy it now listings) and you can find better deals at times, but it would be the exception. The links are Ebay affiliate links (see above notes for disclaimer). *I don't always mind having a crop in video mode, because I'm used to the 2x crop of Micro Four Thirds sensors! Product Price (Used) Notes (Good) Notes (Bad) Canon RP ~ $600 ? No IBIS, limited video specs (only 24p in 4K) and bad AF in 4K video mode. Nikon Z5 ~ $634 I bought this, tested it, and it is REALLY bad for video...so it's kind off my wish list now. 1.7x crop (in 4K video mode) yet the worst problem is the video quality. Even after creating custom Picture Controls (lens-sensor specific) it's really bad. Nikon Z6 ~ $789 IBIS, No crop in 4K video mode No SD card slots (only expensive CF Express, etc.) Panasonic S1 ~ $875 IBIS, combo tilt/flip-out screen Bad AF, no real-time LUTs Panasonic S5 ~ $860 IBIS Bad AF, no real-time LUTs, 30-minute video recording limit Sony A7rii ~ $757 IBIS (first generation) 4K video is only good in 1.5x crop sensor mode (I don't mind*) MY SOLUTION: A DUAL-CAMERA SETUP! As I delve deeper into the advantages of both formats, I recommend that filmmakers consider a dual-camera setup. For instance, pairing a micro 4/3 camera with a full-frame camera can provide the best of both worlds. One camera can be mounted on top of a rig, and the other on the bottom. This configuration gives you greater flexibility as it prepares you for a lot more shooting scenarios (and it also makes people think you're weird, but we need to stop caring about that anyway, right?) One advantage of smaller, lighter cameras, is you can mount multiple cameras ON ONE CAGE! Also, keep in mind that it really helps if the cameras have good IBIS (especially for the top camera/cameras). Two Cameras On One Cage: Helps you get two shots (WIDE & TIGHT) using just one tripod! I usually put the camera with the WIDE shot on the bottom, and the TIGHT shot on the top SUMMARY: Which ever way you go (either all full-frame, all M43...or some of both) I'm thinking it might be good to embrace the learning experience that comes with using both formats. By experimenting with micro 4/3 and full-frame cameras, we can actually experience the strengths and weaknesses of each format. Hey, maybe by stepping outside of our comfort zones and exploring different sensor sizes, we can learn why people are so loyal to the other? Each format really does offer unique advantages and when used together, they can really enhance your content creation capabilities. The following ads help fund THIS BLOG (Click one to send me money for 100% free ) I know, sometimes these ads look the same... ...But I figure if I'm trying to make money, so why not post 3 of them eh?
- SOOC Video: Straight-Out-of-Camera Video (Almost)
INTRO: Have you ever thought about shooting SOOC, but were worried the dynamic range would suffer? Well, I don't want to be that confrontational guy who says "Don't ever shoot in LOG" but I will say, I've been working on a solution that can not only make SOOC video work, but that can help improve the relationship between the lens and the sensor (because each lens sends light to a sensor differently). So, in this blog post I'll cover a few of the reasons I use "I-Cs" (In-Camera Settings) and why I think it's a better option for those of us who aren't experts in color grading (vs. shooting flat or in LOG). You'll have to admit shooting SOOC is a lot more fun, but you're probably wondering how it will affect your "dynamic range". Well, you may be surprised how good it can be when using my custom (lens-sensor specific) settings . ABOVE: This blog post will explain why I use custom (lens-sensor specific) camera settings and an SOOC workflow, and how it not only makes it easy to color grade (compared shooting "flat" or in a LOG profile) but makes the whole experience more enjoyable, overall. WHAT IS "SOOC FOR VIDEO"? You may not have heard the term SOOC in the context of shooting VIDEO. Or, you may have HEARD of it, but never thought it was legit idea for video capture. So, let's go over the definition, and my take on using it for video. SOOC means "Straight Out of Camera" and as I mentioned, it's been primarily used by "lazy" still photographers who didn't want to shoot RAW (and process their images later). You might say, the photographers who do this are "fake" photographers, and Jared Polin (@froknowsphoto) and his clever series of "I Shoot RAW" t-shirts, made this idea into sort of a religion. On the other hand, for those who shoot SOOC, it's kind of an anti-post-production movement of sorts, of which I understand some of the applications (a lot of news, sports and other quick-turnaround jobs require shooting in JPEG, etc.) The real question is then, are there any benefits to an SOOC workflow for VIDEO? I guess the first, and most obvious application is LIVE video, but beyond that you might ask "What's the point?" The short story is, I figured out a way to make SOOC video work but the long story is, I had to create a library of custom settings to make it work. ABOVE: In the video above, I'm showing a test of how using CUSTOM (lens-sensor specific) camera settings can improve the image SOOC (this blog post will explain why I use what I'm calling an "Almost SOOC" workflow). WHAT ARE "LENS-SENSOR SETTINGS"? So, you probably already knew what SOOC meant, but you may be wondering what "lens-sensor settings" are. This, as I mentioned, has been a long story, but I've published a lot of podcast episodes about it (plus some YouTube lens-sensor settings test videos) that tell and show more about this concept (links at the bottom of this page). So, go ahead and check out those resources first if you want additional info. Why I Shoot SOOC (vs. Log or "Flat") IT'S EASIER TO JUDGE EXPOSURE IT'S EASIER TO JUDGE COMPOSITION IT'S MORE INSPIRING THAN "SHOOTING FLAT" IT'S A LOT LESS EXPENSIVE IT MAKES POST-PRODUCTION SO EASY! REASON 1 IT'S EASIER TO JUDGE EXPOSURE I'm not sure how to say this, but the people who tell you that you need to be able to read a histogram, and set your "zebras" correctly to judge exposure, are a bit idealistic. Most of us didn't know how to do these things when we were first starting out, and even after we learned, we'd still would mess up our exposure while shooting in log modes. So, who's to say that using your screen to judge exposure, doesn't work? You DO need a camera with an accurate screen, but if it has that, I think this method can be more accurate than mentally decoding a histogram into the light and dark areas that make up a scene. It's especially important if you're using a stepless (de-clicked) aperture or a variable ND to adjust exposure, (because you'll need to see the actual image, as you make these adjustments). Then, if we are telling people to use "zebras" to avoid highlight clipping, I would say we can do that by looking at a non-log version of the image on the screen. Who really wants to have those little zebra lines all over our image when shooting anyway? I think that can destroy creativity even more! That leads me to my next two points about composing your image, and about just plain feeling inspired in the process. ABOVE: Getting the exposure right is much easier when your image is WYSIWYG (What You See Is What You Get). Using my custom SOOC settings makes the image on the camera monitor a lot closer to the final image, and it's therefore easier to judge exposure. REASON 2 IT'S EASIER TO JUDGE COMPOSITION Trying to compose a shot can be tricky if the screen you're looking at is all grayish. My first tip was a bit technical (judging exposure, etc.) but this one (and the next) fall more into the "artistic" category...yet the same principle applies: It's MUCH easier craft an image, when you're not looking at a screen of grayish-looking, log footage! You might say "It CAN be done, You're just LAZY!" but my point is that it can't be done AS WELL, because you're not looking at an image that is accurate to the final image. It feels almost like going back to shooting film, when you have to imagine what your final image will look like, not being able to see the image you're actually recording. It also reminds me of the early days of digital (still) cameras, where the best advice you could give an aspiring photographer was "Don't trust the screen on the back of your camera, and make sure to look at your images on a good, calibrated computer screen." So, to make composition easier, use my custom camera settings and get your image looking good, in-camera. ABOVE: My custom (lens-sensor specific) camera settings make it easier to "get artistic" while you're trying to compose your image, because you'll see exactly what you're getting. REASON 3 IT'S MORE INSPIRING THAN "SHOOTING FLAT" This point is almost a repeat of the last, but this one is more focused on the struggles artists go through creating an image. It emphasizes what we call the "intangible" aspects of the craft of filmmaking, the part that is art (there's more to capturing a good image than having a technical mindset). So, if you're an "ar-teest" shooting with my SOOC videos settings should make your job a lot more enjoyable...but, I know you're probably still waiting for me to prove your dynamic range won't suffer (more resources are below). REASON 4 IT'S A LOT LESS EXPENSIVE There are a number of reasons why using the SOOC method (and not relying on RAW and fixing stuff in post-production) is less expensive. The first is that you don't have to buy a camera with RAW video (or just 10-bit) capabilities. I'm looking forward to the day when said cameras are actually affordable, but until then, I think we can make 8-bit work better than it has been (at least while we're in our Fake Filmmaking stage of growth). Another reason it's less expensive to shoot SOOC is that (if you have an accurate screen on your camera) you don't necessarily have to buy an external monitor that can load a LUT. You can, and you still might want to (just to have a larger screen and focus-peaking assistance) but my main point is that using my SOOC settings makes it possible to use your camera's built-in screen if you need to. Then, if you add an external monitor for some reason, you really don't need to load a LUT, because my CUSTOM SETTINGS usually get you pretty close (it will depend on each lens-sensor combination). Furthermore, there are a number of other technical things that can be easier when using the SOOC technique, such as getting your white balance right (not saying you shouldn't buy a Color Checker if you can afford it). REASON 5 IT MAKES POST-PRODUCTION SO EASY! This is the part that will make you feel lazy, but shameless plug here: my "lens-sensor specific" camera settings are what make it all work (and the LUT does the final tweak). If you're not familiar with the concept of my CUSTOM SETTINGS check them out on my Budget Filmmaking CAMERAS page. How it works is that (after I calibrate each lens for each camera sensor) you simply use my custom settings while shooting, then apply my mild LUT (to finish the image). You'll need to adjust for exposure, add sharpening and check white balance, but there's not much else you need to do (so much easier than a LOG workflow)! ABOVE: My custom (lens-sensor specific) camera settings help make video footage look as close to what I call "real" as possible...SOOC (Straight Out of Camera) but I am working to make a "finishing LUT" for each combination also. SUMMARY: If you're skeptical about shooting SOOC for video, go ahead and try some of the settings on my website (if you have the same camera and lenses I have). After you try some, I think you'll see they can do a pretty good job in the area of dynamic range, and the workflow is SO much faster and easier than shooting flat or in log! If you want more information about this process and why I think SOOC video can work, check out some of my podcast episodes (and other articles on my blog) listed in the links below, and I hope we meet again. To learn more about how and why I create and use Lens-Sensor LUTs & Camera Settings check out the following podcast episodes: MORE INFO: Lens-Sensor LUTS: Every Lens Has It's Own Story Why and How I Shot Match (Using Lens-Sensor LUTs) Why LUTs Should Be Lens-Sensor Specific When I Use Camera Color Settings vs. LUTs Using Camera Color Settings In Addition to LUTs The Easy Way to Use LUTs (Introducing Base LUTs) The following ads help fund THIS BLOG (Click one to send me money for 100% free ) I know, sometimes these ads look the same... ...But I figure if I'm trying to make money, so why not post 3 of them eh?
- Making a YouTube Video (Easy as Creating a Podcast?)
INTRO: During COVID-19, I started creating YouTube videos and podcasts, and I realized that creating videos was taking much longer. With going back to work looming, giving up making videos (and only recording audio podcasts) was something I didn't really look forward to. So, I started trying to figure out a way to make video production as easy as creating PODCAST episodes, and as crazy as it may sound, I think I may have figured it out! NOTE: This was the first blog post I ever published (way back in 2021) and it was too complicated, so I've been working on streamlining it. ABOVE: To simplify production, I started treating my YouTube videos more like a podcast: I would simply clap when I made a mistake, edit out the claps, and switch cameras. "Why can't making videos be as easy as creating a podcast?" Before I heard about Anchor (which is now Spotify) I had been uploading podcasts to YouTube (I know, that is not what it's for). I had captured lots and lots of ideas as audio recordings, and I thought I should share a few. It was so much faster to create an (audio only) podcast episode than it was to create a video, and that was discouraging. So, I started asking “What if I could make creating a video as easy as creating a podcast? Would that solve my problem?" Now, after a lot of testing, I've come up with a list of things that helped me make the process of creating videos easier & faster, while maintaining good quality. TIP 1 SIMPLIFY YOUR IMAGE (WEAR A HAT?) Anything you can do to simplify your self-image (yet still maintaining the appearance you want) can save time. To record a podcast, I don’t have to comb my hair or dress nicely, but just get a solid audio recording. This has been one of the main reasons I've been able to capture so many audio-only podcasts: I can record any time inspiration strikes (in the morning, at night, in the middle of the night.) I don’t have to prep my wardrobe (do laundry) comb my hair, put on a tie (which I did to hide the lavalier mic) or even shave! For video, you want to look presentable, so it's a little more work. ABOVE: The reason I started wearing a hat was to keep from having to do my hair. I thought it was pretty neat to have my logo embroidered onto it (Vistaprint) but then I got tired of wearing it. TIP 2 SIMPLIFY YOUR SET (& KEEP IT SET) One of the most important time-saving ideas I came up with was to keep my "set" in a state of readiness. For podcasting this was easy, as it could be as cluttered as ever and I didn't have to worry about it. For video however, I knew I would have to come up with a system to keep things ready, so here's my (short) list of rules: The rules for keeping my set ready: Keep desk clean and in shape for recording Blankets need to stay over the windows (for lighting and audio reasons) Background (back table) needs to be empty (unless I'm featuring a product there) TIP 3 SIMPLIFY YOUR PRE-PRODUCTION Most people who read from a script sound like they are reading from a script (only good actors can make reading a script sound natural.) So to start out, don't write a script. Just write down your MAIN points (on a PowerPoint, a Word document or even on a napkin) and just make sure to cover those points while recording. This helps me stay on topic, and it makes the videos shorter (both things audiences usually like) and it reduces time spent in "pre-production". TIP 4 SIMPLIFY YOUR PRODUCTION The overall idea is to reduce the setup and tear down so this is easy enough to do (even when you are stressed or have little time.) This way you can keep the production value up and get other things done too! ABOVE: To simplify production, I mount 2 or 3 cameras on one tripod using a camera rig #ad and two ball heads. Then, to simplify POST production, I capture the signal FROM ALL 3 CAMERAS into a single HDMI recorder. My Production Checklist Leave the set set up (Leave at least the lights and tripod set up.) If you can afford extra cameras (to leave set up in the studio) this can help save time. Use a single, heavy-duty tripod to mount 2 cameras on a "dual camera cage" (one camera for the "WIDE" shot, and another for the "TIGHT" shot ). This saves space and yet lets you capture two camera angles (check out that blog post for more information about the camera angles). Tape the floor with gaffer tape #ad where any pieces of furniture which need to always be in the same place go (perhaps where you stand, etc.) Use manual focus lenses and tape them with gaffer tape #ad (so you don't have to focus & zoom each time you set up) and take them off when you need to use your camera outside of the studio. TIP 5 SIMPLIFY YOUR POST-PRODUCTION I think I've come up with some real time-savers for this part. The biggest timesaver has been to use the footage from the 2 cameras that external HDMI recorder (SSD hard drive) instead of taking the footage from each camera's memory card. Using the ProRes files will speed up your computer, and also provide better-looking footage, but there is an even more important (or should I say "more timesaving" side effect.) You will be able to just dump all clips from the SSD drive onto your timeline AND THEY WILL BE IN ORDER (because when you switch before going to the HDMI recorder, they stay in sequence.) Doing this is super simple, and if you haven't tried it I encourage you to try. You can also edit directly off of the SSD drive (if your hard drive is getting full.) My Post-Production Checklist Use the video files captured to the HDMI recorder (instead of pulling the memory cards from each camera) because these HDMI clips contain footage from BOTH CAMERAS! Drag the MAIN POINT screens (which were exported from PowerPoint) into the timeline and place them where you refer to that main point Edit and export (it's really easy using Davinci Resolve as there are presets for YouTube, Vimeo, etc.) ABOVE: I've since added a mount for an overhead camera for top-down shots (it's a dog grooming frame #ad ) but other than that, I've had the same setup for years now. The long version (every step): STEP 1 SET UP 2 CAMERAS (ON ONE TRIPOD) I will go into detail about this setup in a video, but the short story is that I use two identical cameras #ad on an inexpensive dual-camera cage #ad mounted on a single (heavy-duty) tripod. Then, I prefer to use 2 manual focus lenses (a Nikon-mount 50mm f/1.8 #ad and Tokina 12-24mm f/4 #ad each on a on Viltrox .71x focal reducer #ad ) which are gaffer-taped to the correct focus point and aperture setting (so they are ready to go any time). STEP 2 SET UP AN HDMI SWITCHER (OR AN "ATEM MINI") Feed the two cameras VIA short, 50cm right angle HDMI cables #ad into a small HDMI switcher #ad (or an ATEM Mini) then into an Atomos recorder #ad . STEP 3 SET UP YOUR AUDIO After testing a number of (more complex) audio setups, I've settled on using a lapel-mounted lavalier mic (either wireless or wired to a recorder in my pocket). Using the wireless option lets me feed the audio into one of the cameras while recording, instead of having to sync it in post, but either way it's a lot easier than what I was doing before. I also prefer the sound from a lavalier, because it picks up just a little bit of the environment (instead of sounding like I'm in a recording studio, which doesn't sound very "REAL" to me, though I sometimes do that with my podcast). ABOVE: I set my AUDIO settings using a method I'm calling the "proximity" method (it's based on setting the levels specific to the recording distance, the mic (and audio recorder) being used, and the wind protection. This doesn't matter AS MUCH if you use a 32-bit float recorder. STEP 4 START RECORDING (AUDIO & VIDEO) I mention this even though it’s obvious, because I have at times, skipped this step (smiling). So, make sure to start the 2 audio recordings (on the computer and on the external audio recorder) the two cameras and on the Atomos HDMI recorder. STEP 5 SWITCH CAMERAS OFTEN (WIDE & TIGHT) There are a few reasons to do this, so let me explain. First, if my primary audio (the audio plugged directly into the Atomos external HDMI recorder) is not satisfactory, I will need to sync the video to a second audio file, the recording from either the computer or the external audio recorder. If this is the case, the programs that provide features to sync video to audio (it’s now built into Premier Pro and Davinci Resolve) work consistently well only if there is a spike in the audio (e.g. the clap). I know this because I tried this with clips in which I was speaking more quietly, with no loud parts (and no clap) and those two previously mentioned programs (Premier Pro and Davinci Resolve) told me the audio did not match the video (which it DID, but perhaps there was not enough volume to match the waveforms.) So, clap at every clip, and I will next talk about clapping after every MIS-TAKE. ABOVE: Let's face it, you're going to make mistakes (on camera and in life) but even if you're broadcasting live, it's not the end of the world. If you're NOT broadcasting live however, you can simply "clap after every mistake" (and edit the claps out based on the audio waveform). STEP 6 CLAP AFTER EVERY MISTAKE In addition to clapping every time you start a new clip, I clap every time I need to make an edit. This is the EXACT system I was using when editing my podcast audio and it makes the editing process go very fast. STEP 7 SWITCH CAMERAS AFTER EACH MISTAKE As we have all probably seen, editing out a mistake and staying on the same shot usually results in an obvious jump (in the position of the person’s mouth or body) revealing that a piece was taken out. To avoid this, simply switch cameras after every mistake (and clap at the end of the first shot and the beginning of the second.) Check out the next step to see how this makes it much easier when editing. STEP 8 EDIT THE VIDEO (CUT OUT CLAPS) So, here is the biggest secret: I use an external HDMI recorder (such as an Atomos Ninja 2, or a newer recorder such as the Ninja V #ad ) which is either attached to a Blackmagic ATEM Mini (or an HDMI switcher #ad ) which results in all of the footage, from multiple cameras, ending up on one hard drive. If I use the ATEM Mini switcher, this results in a single file. If I use the HDMI switcher I linked to above, it results in multiple files, but they're sequential, and they're all on one drive. (This is what I used to do before I got the ATEM Mini, and it has it's pros and cons...the good part is you can color grade each camera separately, but the bad is you've got to sync the audio to every, single clip.) ABOVE: All I have to do is edit it in the same way I do for a podcast, which is by looking for the spikes in the audio that occurred when I clapped after each mistake, and then edit those out. STEP 9 EXPORT & UPLOAD (TAKES LONGER THAN AUDIO) As I mentioned above, this step is REALLY EASY if you're using Davinci Resolve, since all you have to do is click to navigate to the "Deliver" section (button at bottom) and select "YouTube" (or the destination platform) wait a little bit (depending on the speed of your computer) upload, and you're done! UPDATE: I no longer recommend the "YouTube" preset in Davinci Resolve, especially for the compressed footage that comes out of the super-low budget filmmaking cameras I'm using. I use the "H.264 Master" method now (certain cameras like the Panasonic G7 really need this, or the footage will show lots of compression artifacts). It takes longer to upload, but it's faster to export, and the improvement in quality is worth it! CONCLUSION: Does this cover everything? Let me know in the comments below. I know that in many scenarios you may want to add a few graphics (such as screenshots, etc.) to support the dialog in such a video, but we're going to give it a try without much added and see if it works out. Thank you everyone! The following ads help fund THIS BLOG (Click one to send me money for 100% free ) I know, sometimes these ads look the same... ...But I figure if I'm trying to make money, so why not post 3 of them eh?
- Is Breathing on Lenses a Good Idea (Even with a LensPen)?
INTRO: I used to think the story about lens fungus was a lie crafted by desperate camera salesman in an attempt to sell the latest (and most expensive) lenses. If they could convince me that putting (infected) used lenses into a camera bag with new lenses could potentially ruin the new ones, it might scare me into buying an entirely new system! So, I remained skeptical about this story of lens fungus for quite some time. Then something happened to my trusty, old vintage Nikon 80-200 f/4 AIS lens: it got an infection. Vintage lenses (especially old 80-200 optics) are becoming difficult to find without fungus. So, when I find one the last thing I want to do is introduce fungus myself! MY NIKON 80-200 THAT ALMOST DIED My Nikon 80-200 f/4 AIS, when used on a Panasonic Micro Four Thirds body with a .71x focal reducer, was an excellent low light tool, that didn't cost me anywhere near what the f/2.8 version would have. I used it for indoor photography (meetings and conferences) quite a bit, and I was happy with the quality and results. But, when I cleaned the Nikon 80-200 with a LensPen (following the instructions to BREATHE on the lens) immediately put the lens cap on and put it away (for what would become 3 months of storage) something bad happened. After three months of non-use (due to having switched to a Panasonic FZ1000 for most of my indoor telephoto work) I pulled the old "beer can" lens out of storage and was shocked to find the front element "frosted over" with lens fungus. I HAD USED LENSPENS SEVERAL TIMES BEFORE... At first, I had no idea why the fungus would have grown so quickly, when I had used a LensPen on it SEVERAL times before and had no problem. You may be saying the same "I've used a LensPen for YEARS, have ALWAYS breathed on my lenses AND HAVE NEVER HAD a problem with lens fungus!" I had too, and had in fact I had learned about breathing on lenses (to clean them) by watching camera salesman do it at a local (long since closed) camera store. I wondered "Why did my lens suffer lens fungus when many other people have not experienced the same issue?" When I was a kid, I remember seeing a camera salesperson breathe on a lens, and then use a lens cloth to clean it. I thought it was weird...but even the LensPen manual says to do it...but DON'T DO IT! IS LENS FUNGUS IS REAL? My question as to whether lens fungus is real has been answered, but not in the way I would have wanted. I almost lost one of my favorite vintage lenses. Because of the risk of the fungus spreading, I sprayed quite a bit of 70% rubbing alcohol on the face of the lens (not recommended)...followed by doing the same with the lens cap and then letting them sit until completely dry. Then I did it again, and this time used a clean lens cloth to try to wipe the rest of it off. The good news is, the rubbing alcohol removed the frosty layer of fungus on the front element. I felt sure I had damaged the multicoatings on the front of the lens in the process though...but I figured it was worth it to sterilize the lens (and keep it from spreading). The questions that remained were: "Will the fungus come back?" and "Should I continue to use a LensPen?" Here's a little inspiration to motivate you to keep fungus from growing on your lenses (i.e. cleaning them is no fun...sometimes there's no going back). WHERE DID THE FUNGUS COME FROM? As I thought about what to do, I remembered reading about how our mouths can be pretty dirty and contain a lot of bacteria and/or pathogens. I formed a theory that what may have contributed to the growth of fungus on the 80-200 lens was a dirty mouth (because it seems that a little of it may come out each time you breathe on a lens.) Also, if you follow up breathing on a lens by using a LensPen that had been used several times before (and put back into the wet and dark environment UNDER THE LENSPEN CAP) I figure that you may be introducing both old and new bacteria onto your lens each time you use that LensPen. The only thing worse than BREATHING on a lens (and then using a Lens Pen) is using a FAKE LENS PEN to clean your Tiffen Black Pro Mist 1/4 and having it smear glue (from underneath the cleaning pad) on it! DO I STILL USE LENS PENS? Yes, but I don't breathe on my lenses any more to moisten them, as the LensPen instructions say to do. I'll spray Zeiss Lens Cleaner or do my cleaning with Zeiss Wipes #ad but sometimes I do finish it off with a LensPen (that I've never breathed on). CONCLUSION: In the end, I still recommend using the REAL LensPen (be careful of the fake ones, like in the image above). it's really, really important to not breathe on lenses to "clean" them though, and that's the main point of this article (sorry for repeating it so much). I'm glad I was able to learn this lesson on a low-cost vintage lens (and not on a really expensive lens)...If, however, you have to experience this loss with a more professional and expensive lens (and maybe one you depend on) that could really affect your budget (and maybe your career, if you think you need expensive lenses). So, don't breathe on your lenses, and especially don't do it right before putting them into storage for a long time. The following ads help fund THIS BLOG (Click one to send me money for 100% free ) I know, sometimes these ads look the same... ...But I figure if I'm trying to make money, so why not post 3 of them eh?
- Where Did the Word "Podcasting" Come From?
THIS BLOG POST IS FAKE: I like peas in the pod, but I don't like what I call "Dis-em-podded peas." So, I wrote a poem about how it all happened...how people first started separating peas from their pods. The REAL History of "Podcasting" Back in the days before TV, when radio ruled the airwaves, an unfamiliar sport emerged. In this sport we can see its roots remain, in the name of our (online) radio talk shows. It all began when farmers started taking some peas out of their pods and casting them off, to the side. Some started to see how far they could toss, those pods without peas. They practiced their form, and footwork and such, until casting became, all but a sport. After a while, their fan base grew (dads, moms, boys and girls, grandmas & grandpas too). Then, unofficially, the sport got it's start, and farmers began to compete. Yet, sad to say, when COVID came, the fans were forced to stay home. Only them announcers, (and the farmers themselves) were cleared to stay, in the field. So, alone with a purpose, them announcers flew, to game after game, and fight after fight. They followed every toss, every twist and turn; day after day, night after night. "Farmer Dan winds up, such a master of the game..." Announcers would gush, and build their fame. On and on them broadcasts roared, to keep them fans, from getting bored. Sponsors and sponsorships, there weren't a few: Chips and salsa, and every kind of brew. ...after a while, the world seemed stuck, watching them farmers, pull peas, then shuck. Since those days, the buzz hasn't ceased, if anything the noise has INCREASED! So now we know, why people toss peas, and that what it was, was Pod-cast-ing . The following ads help fund THIS BLOG (Click one to send me money for 100% free ) I know, sometimes these ads look the same... ...But I figure if I'm trying to make money, so why not post 3 of them eh?
- A "Multimedia" Content Creation Workflow (PART 1: Capturing Ideas)
INTRO: After I wrote my first blog post (about making video production as easy as podcast production) I started thinking about how to optimize my workflow in general. What I discovered may save loads of time and creates what I call a "multimedia" content creation workflow. IT STARTS WITH AN IDEA (ON A PAPER NAPKIN?) We've all heard about how the original Pixar team came up with almost all of their most popular ideas in one meeting, while writing notes on a napkin. (If you haven't, read about it here .) So, not enough can be said about the importance of CAPTURING (important) ideas when you have them, I'm going to take this concept of idea capture a little bit further. We're going to talk about how to craft those ideas into true multimedia content. Lets go over various capture methods I've used, and their pros and cons. OPTION 1 PEN & PAPER (NAPKINS?) The obvious benefit of this method is speed and, uh, cost I suppose (although there are less expensive and more environmentally friendly options than paper napkins). The cons include: Limited space Difficult to draw on napkins (if you're likely to do that) Environmentally unfriendly OPTION 2 TYPING (ON A SMALL COMPUTER) There is bit of a trick to this one here, and I believe it lies in finding a small, low-cost, touchscreen Windows "convertible" laptop WITH EXCELLENT BATTERY LIFE. The reason for the "small" is so that you can take it everywhere with you. The reason for the low-cost, is that you don't need to worry about making this the only laptop/tablet that you buy. The reason I prefer it's a touchscreen is for how much more efficient they are for editing text and word processing (selecting text is super easy on a touchscreen). Finally, the reason I mention having a Windows tablet is that you can download Microsoft Office and use all of the other productivity tools you use on your desktop computer. Remember, this computer doesn't need a very fast processor, etc. It just needs to have enough storage space. NOTE: One thing that is very important to watch out for when buying a Windows tablet/laptop is to make sure it has AT LEAST 64GB of storage (32GB is not big enough for Windows 10 anymore, though it was for early versions). OPTION 3 AUDIO NOTES I like this method because, for me, it's often the fastest way to CAPTURE ideas, but the negative is that it can take some time to re-listen to your audio notes (and then turn them into text). Therefore, it used to be my favorite method, and I still use it when I'm tired, but it has fallen to second place behind typing on my little computer. OPTION 4 VIDEO NOTES I am still working on improving my video production methods, so this one is still more work than it should be. (I hope to update you all when I figure this part out!) The benefits include the ability to SHOW people things and not just talk about them. Remember show-and-tell from grade school? The cons of this method include larger file sizes, more gear and higher skill-level requirements. OPTION 5 POWERPOINT (1 SLIDE PER POINT) I left this method for last, because I'm really excited about it (though I'm still developing this technique). What I've been doing is using PowerPoint to, sort of, create storyboards with words. (I do plan on adding rough sketches as well, but not yet.) There are a ton of benefits to using PowerPoint including: It allows you to create a text file and then import that into PowerPoint (to AUTOMATICALLY create slides at each line break!) It makes it really easy to move "slides" around (to change the order of your ideas) It lets you add (hidden) notes to each slide (which can be exported or printed if needed) It allows you to add graphics (images and/or clip art) You can actually use it as a presentation tool as well (the original intent of the app!) NOW THAT YOU'VE CAPTURED THE IDEAS... After you've captured your idea in one of these "raw" formats, how does one craft that idea into a finished piece of media, such as a blog, a podcast or a video? Well, that's the fun part (for creatives) and it's what this article was supposed to be focused on. It's where I had an "ah-hah!" moment, and came up with what I'm calling a "true multimedia workflow". SO, WHAT'S A TRUE "MULTIMEDIA WORKFLOW"? In the old days, "multimedia" was just a fancy term that meant you could work with art, audio and video on a computer, which was quite a new thing back then. Now, I use the term multimedia to refer to a process of simultaneously creating content in multiple formats AT ONCE! This means you'll be creating a blog, a podcast and a video all in ONE WORKFLOW. My goal is for this to save time (therefore money) with the result the content has been unified across all media, which then can translate to better SEO. BONUS TIP THIS CAN HELP WITH "SEO" The short version is: It helps the SEO because you START with a blog post, which requires a title and URL and to name the image(s) to match the blog URL (Source: Louise Myers, Visual Social Media, article here ). Then, you can either create a podcast or a podcast AND a video using the blog as your script! NOTE: Remember that it also helps to make sure your YouTube title and thumbnail image are consistent with the content of this media pod as well. The following ads help fund THIS BLOG (Click one to send me money for 100% free ) I know, sometimes these ads look the same... ...But I figure if I'm trying to make money, so why not post 3 of them eh?
- Food Photography with the Panasonic FZ1000 (& App)
INTRO: I'd like to talk about the food photography shoot I did for a restaurant a few years ago. The reason is, I used a camera that I would have never guessed could do the job, a Panasonic FZ1000 #ad AND I used an "advanced" food photography technique (that's actually quite easy) that used a constant light source (no flash). As a former still photographer, this went against everything I had believed and done before. I was using one of the smaller-sensor BRIDGE CAMERAS (with a non-interchangeable lens) and NO STROBE OR FLASH! All of these factors would normally result in grainy and blurred images. However, this all worked out because I was using a (40") slider #ad for stabilization (and to recomposed each shot quickly, repeatedly). Then, what made it even easier (and actually pretty fun) was to add a remote control (using the Panasonic Image app). UPDATE: After using the Panasonic Image App recently (on a couple of different phones, in a number of different RF environments) it isn't working too well UNLESS YOU ARE CLOSE TO THE CAMERA! ABOVE: Doing a food photo shoot with the Panasonic Image App in conjunction with a Panasonic FZ1000 camera (and a 40" slider on 2 sturdy tripods) is a super-efficient food photography workflow that allows clients to see the images on screen (and even take them). WHY USE A SLIDER (FOR FOOD PHOTOGRAPHY)? The first question that may come to a photographer's mind is regarding the slider. Why use one for food photography? Aren't sliders designed for capturing motion (video) and not stills? Well, the main reason I use the slider is for stability and not for motion. I mount it on 2 sturdy tripods. I use a couple of medium weight Manfrotto tripods #ad (the old 3011 is good) purchased used through OfferUp. (I do not recommend using light stands to hold the slider, or even 1 tripod, as this is usually not sturdy enough.) So, when the slider is mounted on 2 sturdy tripods, it eliminates camera shake. The next part is the most exciting, however; I use the slider function to quickly reposition the camera (in proximity to the food being photographed on the table below) to quickly grab shots from different angles. One from the left, one from center and one from the right, or whatever sequence of shots you'd like to take. This makes taking several photos quickly (from different angles) a breeze, because you never have to rotate the plate of food. WHY USE THE PANASONIC FZ1000? The question as to why I used the Panasonic FZ1000 #ad (for food photography) should come up in most photographer's minds. "Isn't that a (despised) bridge camera, with a small sensor, poor low-light capabilities and a lack of macro?" Yes, yes, yes and yes. However, it worked great, amidst all these limitations. The small sensor was overcome by using a low ISO and enough light (an LED with a minimum of 600 LEDs if non-bi-color, 1200 if bi-color). Then, the slider (and sturdy tripods) kept any camera shake in check. Then, finally, the lack of a macro never really came into play, as I stayed about 6 feet away from the food plate and zoomed in to the telephoto part of the lens. USING THE PANASONIC APP IS AWESOME (IF CLOSE)! There is something even more interesting about using the FZ1000 #ad for food photography though; the ability to control the focus AND ZOOM from an Android (or iOS?) tablet (from a distance). If you've never used a tablet to control the focus AND ZOOM of a camera, you're in for a treat. I use a 7 or 8-inch Samsung (Android) tablet #ad with a protective case #ad and it looks super professional because it allows me to show the client the images on a larger screen, AND they can even be the one taking the pictures if they want to: I compose (by moving the slider) they focus and shoot (by simply tapping on the tablet screen where they want it to be in focus). The whole setup isn't very expensive, but clients have been very happy about it because it shows them exactly what they're getting, and that is what can speed up production dramatically (if the client isn't too picky, but if they are, it's on them). CONCLUSION: So, as far as productivity, this setup allowed me to shoot the entire menu in 1 day (2 sessions of 1/2 day each). While I was prepared with a shot list (created from a printed menu they supplied) the team (including the owner and cooks) made it very easy by quickly cooking and styling each dish. It was a fast-paced and invigorating experience, but using the FZ1000, on a slider and with a tablet powered by the Panasonic Image App, it was easy! The following ads help fund THIS BLOG (Click one to send me money for 100% free ) I know, sometimes these ads look the same... ...But I figure if I'm trying to make money, so why not post 3 of them eh?
- MIS-QUOTE #1: "Build a Better Mousetrap" (No One Will Know)
First, a word from our sponsor (or maybe somebody else) So, here's the actual start of this blog post: INTRODUCTION: While learning to promote my own business, I've been thinking a lot about advertising... but anyone in the advertising business knows that simply THINKING about it doesn't do anything. In fact, it sort of contradicts the primary meaning of the word "advertising" ("the action of calling something to the attention of the public especially by paid announcements"). So, what does not advertising have to do with the famous quote about mousetraps? ABOVE: According to Wikipedia, the form of the quote we've probably all heard was a "misquotation" of Ralph Waldo Emerson's original statement. DID HE REALLY SAY "MOUSETRAP"? The quote we all have heard is "Build a better mousetrap and the world will beat a path to your door." According to Wikipedia however (I know, not always a perfect source) Ralph Waldo Emerson never said anything about mousetraps . He did say something similar to the part about the world beating a path to your door, but the products and services he mentioned did not include a mousetrap. Even so, I think this saying can be misunderstood, and it "does not mean what you think it means" (to quote another, slightly less reliable, source ). IS ADVERTISING NOT NECESSARY AFTER ALL? So then, for those of us who often emphasize the importance of advertising, this phrase seems to say that if we invent something special, new and great, we don't really need to advertise, because the automatic result is "...the world will beat a path to your door". This is almost completely opposite of what I've been learning about advertising, because if no one KNOWS about a product or service you have created or provide, then how can it sell? WHAT'S THE REAL QUOTE (WHAT DID HE MEAN?) Regarding this super popular quote, this Wikipedia article states what Ralph Waldo Emerson really said, compared to the quote that we all have heard: " Build a better mousetrap, and the world will beat a path to your door " is a phrase attributed to Ralph Waldo Emerson in the late nineteenth century. [1] [2] The phrase is actually a misquotation of the statement: "If a man has good corn or wood, or boards, or pigs, to sell, or can make better chairs or knives, crucibles or church organs, than anybody else, you will find a broad hard-beaten road to his house, though it be in the woods." — Ralph Waldo Emerson [2] WHY DO I THINK THIS QUOTE CAN BE MISLEADING? We know there are hundreds of thousands (if not millions) of ideas that have been submitted to the Patent Office but haven't been acted on. We haven't heard of most of these ideas, and that proves just having a good idea doesn't make it sell. Good ideas, like laws in science, can't be proven to be good without real-world testing. WAS WORD OF MOUTH IMPLIED IN THE ORIGINAL? I believe the second (and now, the most popular) version of the quote fails to emphasize one important (implied?) aspect of Ralph Waldo Emerson's original words: word of mouth advertising . When Mr. Emerson said "If a man has good corn or wood, or boards..." I think it would have been an assumption (in those days) that the audience would know that word of mouth advertising would be a part of the story. It was in the days before radio and television, and was certainly before social media was a part of our daily lives! The main point is that for a product or service to become popular, first people would have to experience that product or service, like it, and then would certainly tell others as a result. So, my guess is was what CAUSED the increase of traffic to the home of the inventor (the "broad hard-beaten road to his house...") would have been word of mouth...which, being a form of advertising, shows how important advertising is. Good ideas don't sell themselves. You have to put them out there. CONCLUSION: So what do we take from all of this? I believe both versions of the quote can serve a similar purpose and together they emphasize two (2) things: The necessity for your product or service to be "better" (though I think a non-saturated market provides sufficient demand for (or at least can tolerate) inferior products or services. The necessity for people (at least a few, who can start the "gossip chain") to KNOW about your product or service. The following ads help fund THIS BLOG (Click one to send me money for 100% free ) I know, sometimes these ads look the same... ...But I figure if I'm trying to make money, so why not post 3 of them eh?
- What Makes High Quality Video? (Keven's Mantra)
INTRO: I took only one video production class from producer, director and camera operator Keven Strehle, but it was one of the most enjoyable classes I ever took. During the class, Keven taught what he called his "mantra"; a short list of video production tips that covered what I would call the "essential quality factors" of storytelling, camera stabilization, audio and more. Unfortunately, due to my "focus" on shooting footage during the class (and not taking notes) I wasn't able to remember Keven's mantra. I've thought about this several times over the years, and when I learned of Keven's unexpected and tragic death in 2013 (of a motorcycle accident) I started to regret not memorizing it even more. This concept of focusing on key things that affect video production quality, inspired me to create this list of "factors". These are what I consider the most important factors for creating authentic, reality-based films. ABOVE: I was inspired by Northwest Backroads producer, director, and camera operator Keven Strehle to create a short list of the factors that affect video production quality. Keven was one of my favorite teachers at Highline College. Unfortunately, I didn't take enough notes during his class, so I've struggled remembering his "mantra". What Makes a Quality Video Production? REAL, GOOD CONTENT (STORYTELLING) REAL, GOOD IMAGES (ORGANIC, NOT "DIGITAL") REAL, GOOD AUDIO (SYNCHRONOUS?) REAL, GOOD ACTING (OR NOT ACTING?) REAL, GOOD COMPOSITION (NO FISHEYES) REAL, GOOD DEPTH OF FIELD (DOF) ACCURATE FOCUS (EASIER W/MORE DOF) REAL, GOOD STABILIZATION (NOT SHAKY) REAL, GOOD EDITING (NO SPECIAL FX) REAL, GOOD DISTRIBUTION (NOT VERTICAL) FACTOR 1 REAL, GOOD CONTENT (STORYTELLING) Keven had a passion for telling true stories, especially those set in the outdoors, and these are the stories for which he became famous (won several awards) for. Every good filmmaker talks about story. It's important, because without it viewers are left with nothing (and can feel like they've wasted their time). So "content is king" (and is listed first for this reason) but I don't agree with the "equipment doesn't matter" idea, and I'd prefer to say "equipment is MUCH LESS important than story". FACTOR 2 REAL, GOOD IMAGES (ORGANIC, NOT "DIGITAL") Again, if you're your goal is a less-than-realistic final image you may not think this is important, but in my opinion, even if you're going for changing the overall mood of a scene to a more dramatic color grade, you still should learn to make all the shots match. Patrick, a really good color grading artist from mixinglight.com emphasized the importance of making your cameras match, and said: "Shot matching is a key skill for anyone doing color correction. Well matched shots add tremendous production value to a project and enhance the effectiveness of the narrative by not forcing the audience to expend effort to maintain their suspension of disbelief." It is also important that the two (or more) cameras have the same contrast (and other image-related properties) but that's a topic for another post. MORE INFO: BLOG How I Set Camera Settings (Like the Zone System) PODCAST How I Improve Lens-Sensor Relationships Using Camera Settings FACTOR 3 REAL, GOOD AUDIO (SYNCHRONOUS?) Pretty much everyone agrees that if the audio is bad, nobody will like the video (no matter how good the video itself is.) This is actually one of the things I DO remember from Keven Strehle's mantra: "...compelling audio". When you're first learning video production, this can be quite a challenge, but it's one I believe you start to enjoy when you begin capturing good enough audio to feel the overall impact it has on your films. Audio recording may be one of the most underrated (and underappreciated) arts in the world because it's kind of "invisible" in that when the audio is GOOD, no one seems to notice, but when it's bad, you'll get lots of feedback (pun not intended, but it fits here). ABOVE: Getting good audio was one thing Keven emphasized in his mantra ("compelling audio"). Here, he helps a student figure out how to dial in his audio settings. FACTOR 4 REAL, GOOD ACTING (OR NOT ACTING?) I always say that good actors don't appear like they're acting. Sometimes they're so good you may find yourself saying that you do or don't like a certain actor based on a certain movie they are in (but then you see them in a different movie and you "can't stand em"). Bad acting stands out, but good acting, like some of the technical factors that we'll be considering, become "invisible" and seem to be part of the story. They are so good you find yourself believing it's real (or, have to expend less effort to do so). My personal approach to acting is to try to stay as close to my true personality as possible in a role, and this makes it easier to improvise and yet be consistent and true to your character (two skills that are sought after in actors). FACTOR 5 REAL, GOOD COMPOSITION (NO FISHEYES) This factor is very important and the most powerful evidence for this is how much many filmmakers rely on storyboards to set up their shots. There are many different "takes" on this subject, some recommending the strict use of storyboards (and some saying they can cramp your creativity) but my point is not to demand or require STORYBOARDS, but simply to emphasize the importance of composition. I " always shoot with 2 cameras " and I think this approach is the easiest way to speed up compositional decisions (i.e. don't try to decide if it should be a wide or tight shot, JUST GO AHEAD AND SHOOT BOTH). ABOVE: I loved Keven's style of teaching; he encouraged us to start by using the gear we had, and he was always there to make sure we got it right. FACTOR 6 REAL, GOOD DEPTH OF FIELD (DOF) You may have heard about the meme that grew out of a Camera Conspiracies video on YouTube that jokingly refers to bokeh (the properties of an out of focus background) as "toneh". If you haven't (and can stand some humor) check out the back story here . If you have, you know that having too little of the background in focus can be a bit distracting. To quote the video "Why did you bring us to a lake and hide it?...I want to see the lake..!" My take on achieving realistic depth of field is to ask "what does the human eye normally see?" The general rules I follow are: #1 Our eyes create less depth of field the closer an object is (maybe this helps us focus on the detail?) and #2 The darker it is outside or inside, the less depth of field there will be (and it's pretty neat this works the same with low-light lenses)! FACTOR 7 ACCURATE FOCUS (EASIER W/MORE DOF) Accurate focus is important (mostly) because it affects image sharpness. It is closely tied to depth of field, but depth of field can either make focusing more difficult (and make bad focus stand out due to the contrast of the blurry background) or it can make it easier (by making most of the picture in focus). The point is, either way, if your focus is off, it can be distracting, and unless that is what you want, it can detract from the story (again, the most important thing). The technical way to achieve good focus is changing due to autofocus technology improving, but I find the most accurate way right now is to use manual focus, and there's a bit of a learning curve involved here (practice, practice). FACTOR 8 REAL, GOOD STABILIZATION (NOT SHAKY) This may be the biggest thing that kept me, a former photographer, from quickly becoming a videographer. I had a lot of experience in still photography, but I had relied on either using a high shutter speed or flash to keep my images sharp, and so I HARDLY EVER USED A TRIPOD! This made the transition to video production and filmmaking a challenge. I had to learn to use a tripod, but I did learn and I carry one almost everywhere, yet the need for a tripod lessened when good quality IBIS (In-Body Image Stabilization) was introduced on lower-cost cameras (such as the Panasonic GX85 #ad ). (BTW, I think that's the camera that gives you the most for the money, currently). FACTOR 9 REAL, GOOD EDITING (NO SPECIAL FX) Well again, if your intention is not to mirror reality, then this tip may not be up your alley, but if it is, let's define the term "realistic edit". I consider a realistic edit to be an edit with few special effects that utilizes and 2 or more cameras (because our eyes and brain rarely stay focused on just one "view" of a scene, so I think you need to "cut" to different camera angles somewhat often). So, what about "timing"? Well, my opinion is that timing can be either realistic, unrealistic or downright bad (bad timing would be when the edits are not done with rhythm, etc.) To me, realistic timing causes the edit to switch cameras or angles at or near the same rate that a person's attention would shift from one thing to another in a scene. If it's too fast, the viewer feels like "Wait, I wasn't done looking at that!" but if it's too slow, the person may feel like they want to look around the scene, but the camera isn't letting them (i.e. they are getting bored). Unrealistic timing then, is when the director or the editor (whoever is making the decisions) is either trying to speed up/rush the scene (to shorten the movie, for example) or just doesn't have a sense of timing (maybe no musical talent?) So, the effect timing has on telling the story is probably the most important consideration. FACTOR 10 REAL, GOOD DISTRIBUTION (NOT VERTICAL) I'm adding this "factor" kind of as a joke, but in some ways, I take this very seriously. When real, historical events are captured using vertical composition, I think it's a waste because it automatically removes the possibility of having the footage featured in a documentary, and when it's displayed with black bars on each side (or even worse, over top a blurred image of the same video) it makes my heart sad. However, not only does shooting vertical video lock you in to just certain cell phone markets on platforms that are the furthest thing from "REAL" (i.e. TikTok, YouTube Shorts) but it also gives it the feel of a Mr. Bean production (from the movie " Mr. Bean's Holiday " #ad ). There's too much panning (moving the camera left and right to follow things around) and unreal wide-angle distortion, etc. CONCLUSION: Well, this turned out to be a lot less technical and more philosophical, so If you would like a more nitty-gritty list of technical tips, check out my Top 10 Tips For Easy Video Production . The following ads help fund THIS BLOG (Click one to send me money for 100% free ) I know, sometimes these ads look the same... ...But I figure if I'm trying to make money, so why not post 3 of them eh?
- Always Shoot with 2 Cameras (WIDE & TIGHT)
INTRO: Throughout history, actors have had to be a robot and repeat their performances as directors reshoot over and over again. I thought this was a waste of time (and effort) so I built a multi-camera rig to help solve this "problem". I figured "Why not reduce the number of takes and the strain on the actors by increasing the number of cameras (vs. the number of takes) while you change lenses or camera angles"? However, I've been finding the technique of always shooting with 2 cameras transcends "real" filmmaking, and is even useful for covering subjects of everyday life, including cats, kids and etc. It's almost EVERY TIME I forget to add a second camera (and yes, it can be pretty easy with my "Minimal Kit" method) I tend to regret it...or should I be a bit more emphatic and say: I regret it every time. So, while this article covers the main reasons "WHY" I prefer to always shoot with 2 cameras, I do have another article that introduces the idea of HOW TO: Always Shoot With 2 Cameras . ABOVE: The first video I uploaded to YouTube (above) was a somewhat dramatic talk about why I think it's easier to "always shoot with two cameras". Why I Always Shoot With 2 Cameras: IT'S EASIER, FASTER TO SHOOT IT MAKES EDITING EASIER TOO IT RETAINS A "SENSE OF REALITY" REASON 1 IT'S EASIER, FASTER TO SHOOT While the tradition of shooting a scene multiple times (due to changing lenses or changing camera angles) has been fading away due to camera prices going down (productions can afford to have several cameras on a shoot) the habits learned from those days have lingered. Using a multi-camera rig can speed up the process of shooting by allowing each photographer to capture BOTH a WIDE and a TIGHT shot at the same time! This speeds up movie production and makes reality content much easier to capture (sports events, weddings, etc.) REASON 2 IT MAKES EDITING EASIER TOO One of the powerful things about always shooting with two cameras is (if both shots are good) the director will always have at least two shots to choose from while editing. I always cringed when I heard that certain directors would "shoot wide" (wider than the final shot) so they could have flexibility in post-production. As a photographer, this is really difficult to do, as there is there is such an OPTICAL difference between wide and tight shots that it's hard to separate that from your thinking while shooting (and "just shoot a bit wider" etc.) My approach is to always give the director those two shots they want, but shoot them with the appropriate optics, a wide lens and a tight lens! REASON 3 IT RETAINS A "SENSE OF REALITY" This point is important for movie production, but essential for news, documentary or other reality content. Imagine trying to get all of your shots for a wedding (or other live event) but missing a shot because you had the wrong lens on (too wide or tight). You can't just ask the person to "do it again" (laugh, smile, etc.) because then it wouldn't be real! However, if you always shoot with two cameras (wide & tight) you'll never have to choose which lens to use, so your reaction time can be quicker, and you'll be less likely to miss important moments due to changing cameras or lenses (unless you aren't in the right place at the right time). HOW DO I DO THIS? (USING A MULTI-CAMERA RIG) You can check out my updated post about HOW TO: Always Shoot With 2 Cameras for more details, but you can also watch the brief video below of my rig in action here . I'm also working on KIT PLANS to show exactly what items I use and how I build my 2-camera rigs. ABOVE: Here's a quick video showing my 2-camera rig in action, but for more details of how I always shoot with two cameras (especially as a solo shooter) check out this other article HOW TO: Always Shoot With Two Cameras . CONCLUSION: Tradition dies hard, and every new idea gathers both positive and negative attention, so if you do this some people may think you are strange. The editors will certainly love you though, as you'll be providing simultaneous wide and tight shots for every take, and maybe people will think you're a genius after they see how much faster you're working (and how much easier it is for the actors.) The following ads help fund THIS BLOG (Click one to send me money for 100% free ) I know, sometimes these ads look the same... ...But I figure if I'm trying to make money, so why not post 3 of them eh?
- What Camera Settings Are Best? (DIFFERS FOR EACH LENS?)
INTRO: For years, I searched for the perfect lens-sensor combination; a lens and camera duo that would produce a beautiful image with few adjustments and little post-production. It would be everything I needed, and wanted, in a camera system. However, as I tested each pair, each told a different story. I soon realized that CAMERA SETTINGS needed to be lens-sensor specific... ABOVE: I've been working on testing each of the cameras and lenses I have to come up with CAMERA SETTINGS recommendations that improve the output from each combo. MY GOAL: A REAL-LOOKING IMAGE My #1 goal for these LUTs & camera settings is to capture the most "REAL" image possible. When I think about my motivation for choosing camera settings, I often think of Ansel Adam's "Zone System" . His system focused on capturing detail in all but 2 of the 11 "zones" of a picture. These "zones" were light or dark areas that corresponded to an 11-step grayscale chart. The grayscale steps were marked by numbers ranging from "0" (the darkest area of the image) to "10" (the lightest area of the image) with "5" being "middle gray". (Zones "0" and "10" had no detail because they were either 100% black or 100% white, respectively, but every other zone would contain detail.) To me, this approach preserves what I call the "sense of reality" which, in my opinion, can help keep viewers from being distracted by technical problems (such as unrealistic contrast, sharpness, or inaccurate color). To work toward this, goal, I've been creating custom CAMERA SETTINGS for every lens I own (and sometimes custom, lens-sensor LUTs to finish the image). NOTE: This process will not apply to RAW video/photo workflows. PROCESS OVERVIEW To go toward this goal, I test and tweak the 4 basic camera settings of CONTRAST , SHARPNESS , NOISE REDUCTION and COLOR (and sometimes "Highlight Shadow" settings). While adjusting these settings, the standard and baseline I keep in mind is "reality" (what the eye sees). Another plus of this process is, because I'm attempting to get everything as close to a realistic-looking image SOOC (straight out of camera) while shooting, I seldom have to worry about matching cameras during post-production. Sometimes (less and less) I apply a LUT in post-production, but this is not always necessary because the in-camera settings do most of the work. This is a very time-intensive process to apply to every lens-sensor combination I've used, so I don't expect this is going to be easy the first time you try it, but I'm going to give a quick overview of the process I use when doing my "lens-sensor calibrations". My Custom Settings Method (For CAMERAS): CONTROL THE CONTRAST TAME THE SHARPNESS USE NOISE REDUCTION (DIFFERENTLY) CALM THE COLOR MAKE SURE THINGS WORK (TEST LOTS) ABOVE: I've got a very unconventional way for improving what I call the "perceptive dynamic range" when you're NOT shooting RAW. The over-simplified version is, I use CAMERA SETTINGS to reduce the contrast (and sharpness, etc.) and a custom tonal curve (with in-camera settings) which lets you to lower your exposure...which then captures high contrast situations better. STEP 1 CONTROL THE CONTRAST When I was growing up, I used to read a lot of photography books and magazines, and when the term "contrasty" was used, it has always been a good thing when referring to lenses. However, after testing several digital cameras over the years, I've learned that when trying to optimize the sensor output (to capture a realistic, high-dynamic range image) contrast can actually be a negative thing (no pun about "negatives" intended here). Therefore, to control the contrast I do two things (one is obvious, and the other maybe not so obvious): First, turn down the CONTRAST Then, apply a little NOISE REDUCTION (more details below) Turning down the "contrast" works as you would expect, but also using Noise Reduction is a really interesting (and neat) way to "fine tune" the contrast a little more, especially in the highlights (more details coming on that in step #3). ABOVE: A lot of the great lenses such as this Sigma 18-35 1.8 ART deliver a lot more color, sharpness and contrast info than needed to the sensor. My "custom settings" are simply an attempt to balance these out, in an attempt to capture a more "REAL" image. STEP 2 TAME THE SHARPNESS The primary reason why I try to "tame the sharpness" is because it is the main thing that makes an image look like it's digital (instead of being organic). An easy way to tell if an image is being negatively affected by too much sharpness is to look at the diagonal lines. If the lines look like stair steps (when you zoom in) then it may be too sharp, and I think this causes the image to scream "I'm digital! I'm fake!" This is when I turn the sharpness down. STEP 3 USE NOISE REDUCTION (DIFFERENTLY) Using noise reduction to further fine tune the image is my "secret sauce". Most times when I read about NR, people say "If it needs NR, I will fix it in post". Well, if we were talking about using noise reduction in the NORMAL way, I may agree, but we're talking about using NR in a much funner way...to make the image look better (not worse). Here's how: When you apply noise reduction, it attacks (or does the opposite of) what "sharpening" does: It REDUCES edge contrast (and does do other things too). This actually reduces both the contrast and the sharpness as well, but it does so in a very gentle, smooth way. The hidden benefit to this is that it ends up smoothing the highlight rolloff (a major challenge in some cases). The other thing noise reduction obviously does is reduce digital artifacts, which therefore makes it look more "real" (which I would take over sharpness any day). ABOVE: Even lenses of the same brand as the camera (i.e. "native" lenses) aren't always optimized for each camera that brand is selling. In this case, the Panasonic 45-150 F/4-5.6 telephoto lens was included in the kit with my Panasonic GX85, but before I used my "corrected" settings, the color was oversaturated, the contrast too strong, etc. STEP 4 CALM THE COLOR The most important note about adjusting the "Color" setting is that this is not where I am trying to correct color temperature. That's a task better handled with 24-color charts and proper white balance. Rather, my target is to tone down the colors to a realistic level. I'm not trying to capture a gray, flat-looking image (that only looks good after post-production color grading) but rather an image that looks like what our eyes naturally see. I will say though, that if I err on one side of color (saturation) or the other, it would be to err on the side less color, because as we all know, saturation can easily be added in post-production, but removing excess saturation is sometimes impossible. STEP 5 MAKE SURE THINGS WORK After selecting the settings (which are also based on a bit of experience and intuition) I test the lens-sensor combination in as many environments as I can, low-light to lots of light, from day to night and from indoors to out. The goal is for these settings to work in any lighting condition (indoors, outdoors, etc.) I should mention that I usually like to perform the tests in bright sunlight (the most extreme condition for most lens-sensor combinations) to see if it can accurately render the different light levels, from highlight to shadow. CONCLUSION: After testing (and approving) the camera settings for each lens-sensor combination, I sometimes create a LUT to make the image appear closer to reality (to what our eye sees) as possible. This process takes quite a bit of time, but I really enjoy doing it and posting my custom camera settings on this website. So, stay tuned and check back for new lens tests. To learn more, check out the following podcast episodes: MORE INFO: Lens-Sensor LUTS: Every Lens Has It's Own Story Why and How I Shot Match (Using Lens-Sensor LUTs) Why LUTs Should Be Lens-Sensor Specific When I Use Camera Color Settings vs. LUTs Using Camera Color Settings In Addition to LUTs The Easy Way to Use LUTs (Introducing Base LUTs) The following ads help fund THIS BLOG (Click one to send me money for 100% free ) I know, sometimes these ads look the same... ...But I figure if I'm trying to make money, so why not post 3 of them eh?